Authentication Google account : Hackers can hack your sensitive data like account passwords, bank accounts details, private information etc. So email accounts are a technically unencrypted medium that provides security to your data.
Strong passwords can do this but there is a requirement of two-factor authentication for your Google account to secure your accounts very well. Two Way Authentication means that you have not only set the password of your account but also add a unique code that you get from your phone or any other external source. So no one can access your personal data or crack your password too.
Check Also : 13 Things You Should Never, Ever Google
Authentication Google account : Step by Step
Now, we are going to discuss all the steps of two-way authentication of Google account that are mentioned below:
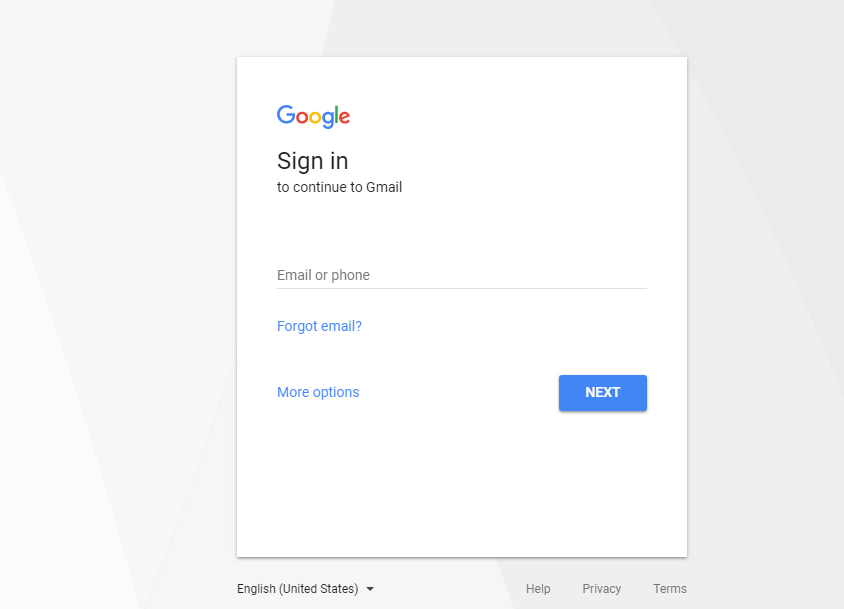
Step 1: Firstly, Log in your account with entering the email id and click on the “Next” button.
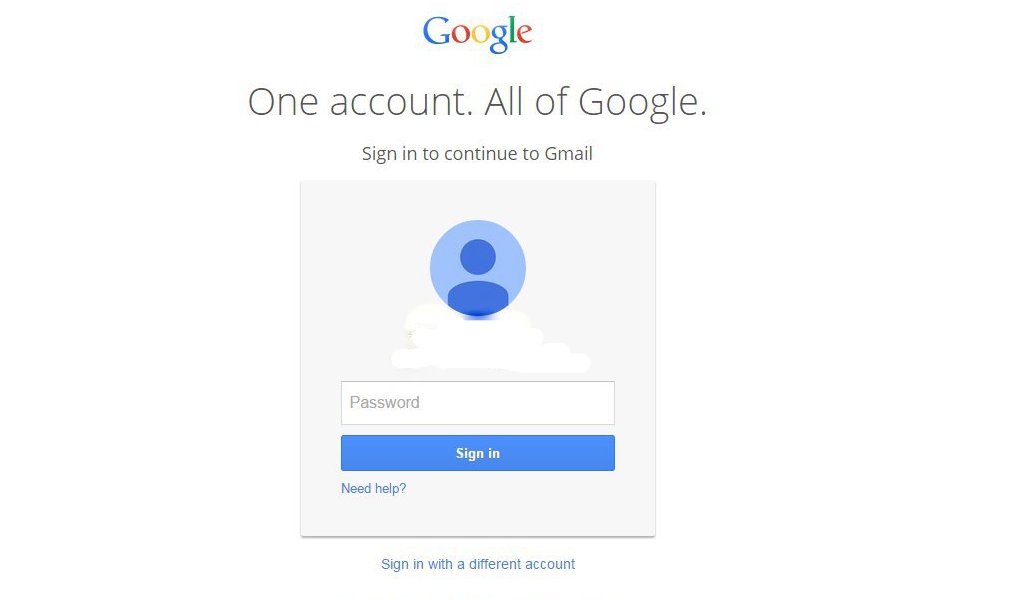
Step 2: A new page is opened. Now enter the password of your email account and click on “Sign In” button.
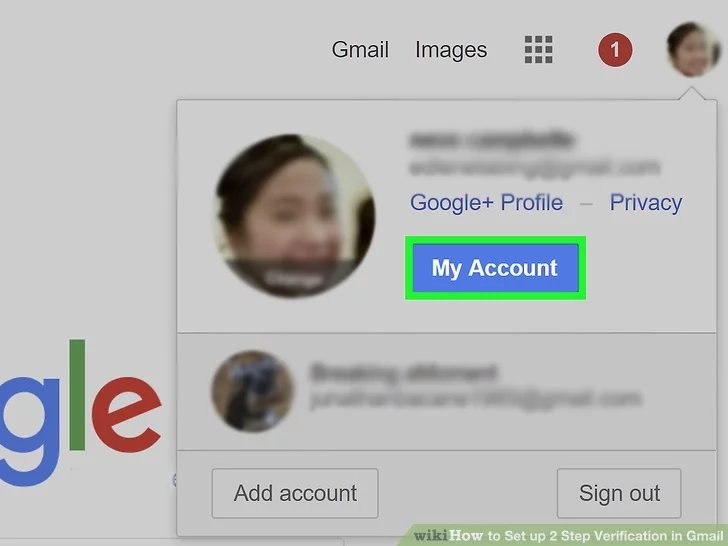
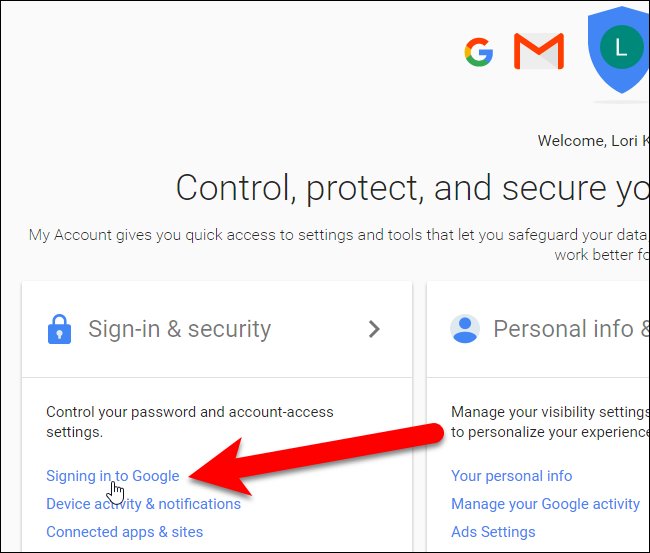
Step 3: Now go to the “My Account” page. This option shows in the top right corner.
Step 4: In My Account Page, click on the link of “Signing in to Google” option under the section of “Sign-in & Security” which is placed on the left side of the page.
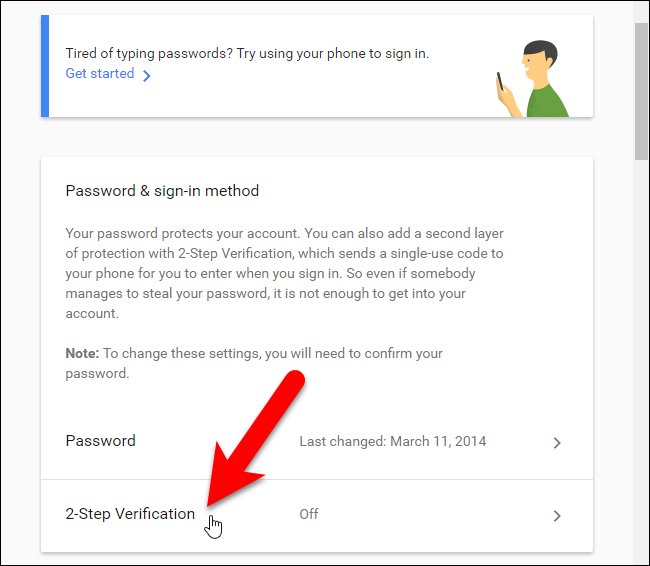
Step 5: A new page is opened on your screen. Under the Password & Sign-in method section, you turn on the option of “2-Step Verification”.
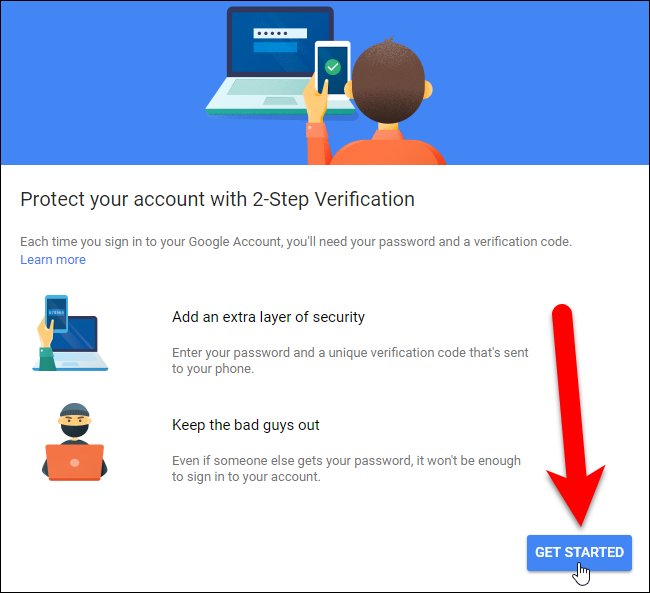
Step 6: After turning on the option, a new window pop up and click on the blue button “Get started” that is placed at the bottom-right corner of the page.
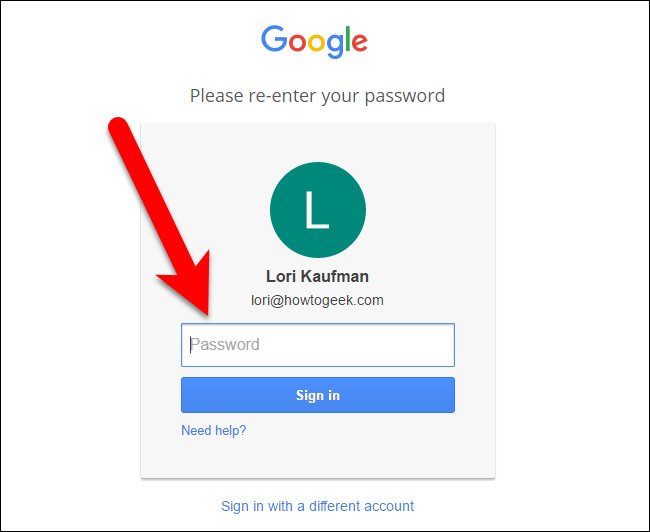
Step 7: After this, once again you enter the password of your email account and click on “Sign In” tab.
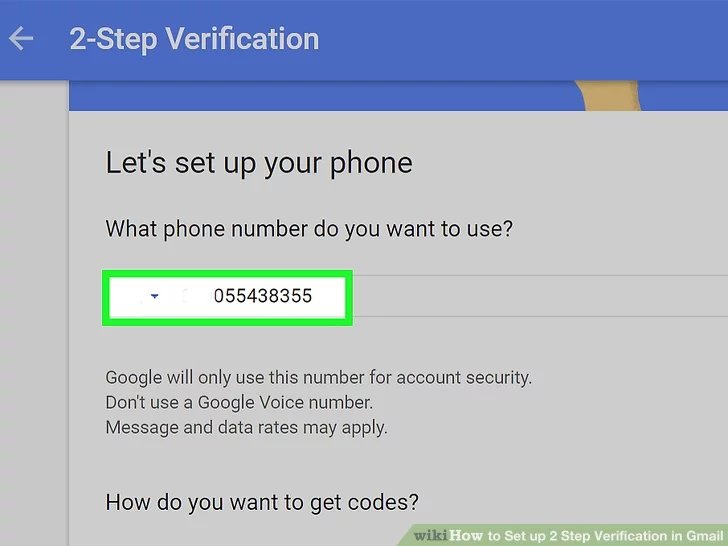
Step 8: Now you have entered the two-step verification. In this, enter the valid phone number in the text field. It becomes your back phone number of your account.
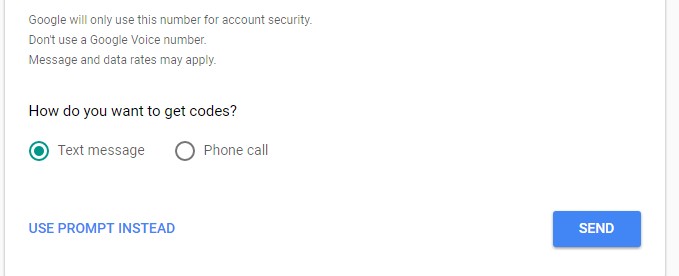
Step 9: Select the code source where you want to receive the code of two-step verification. You can choose “Text Message” option to receive the code in the text format or choose “Phone Call” to receive a call and listen to the verification code. Click on the “Send” option. So it sends the verification code via message or call.
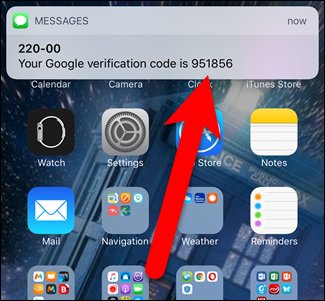
Step 10: You receive the text message of the verification code in the notifications section of your mobile phone.
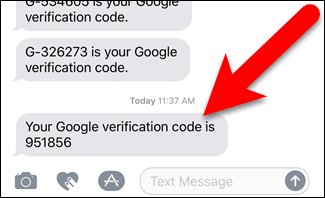
Step 11: If you are not enabled notifications of text messages then you can go directly to the “Messaging App” and see the verification code in it.
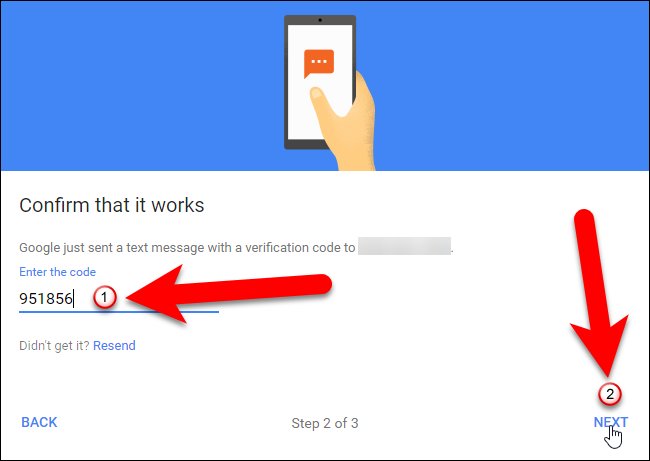
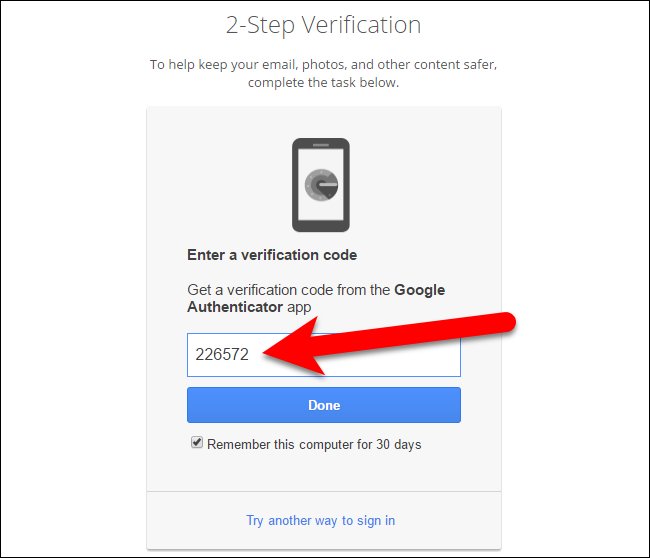
Step 12: Now, you have to enter the verification code in the “Confirm that it works” page and click on the “Next” button.
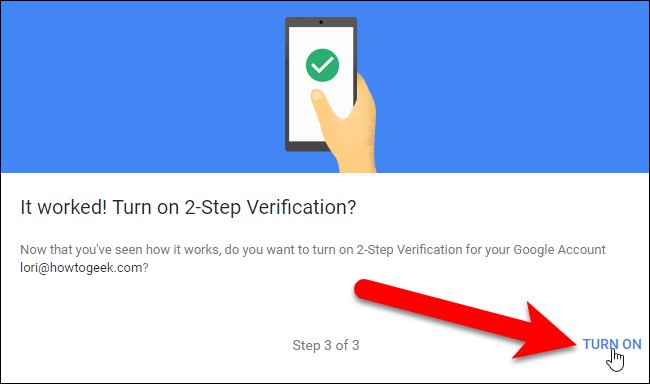
Step 13: After this, a new window pop-ups and shows the message “It worked! Turn on 2-Step Verification? To finish this page, click on the blue button “Turn On”. It enables 2-step verification for your account.
Must Check : 15 Hot Google Chrome Extensions You Must Try
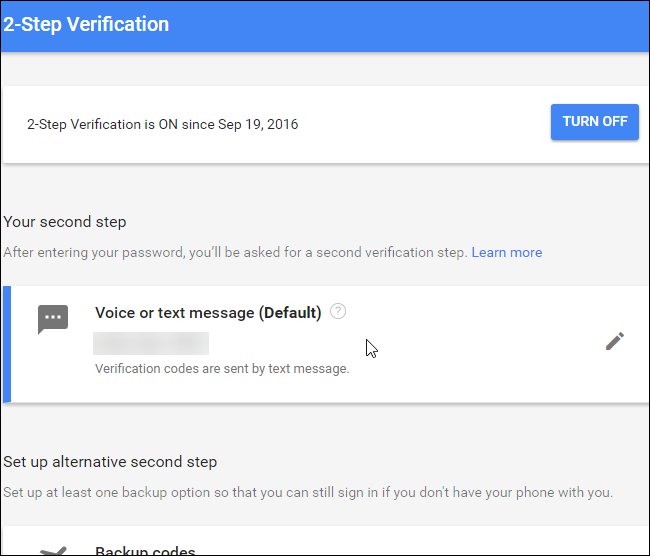
So if you try to log in your account in a new device then it always asks you about a verification code that is delivered to your registered phone number.We are half way done for Authentication Google account.
Step 14: After turning on, it will ask you set up an alternative second step.
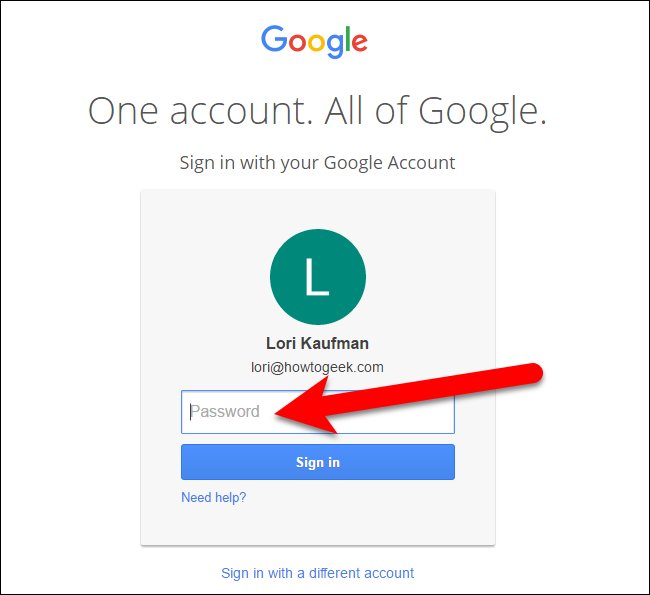
Step 15: To do so, log out from your Google account and again Sign in your Google Account. Enter email id and password.
Step 16: After this, you receive a 6-digit verification code as a text message. Then enter the verification code on the displaying screen.
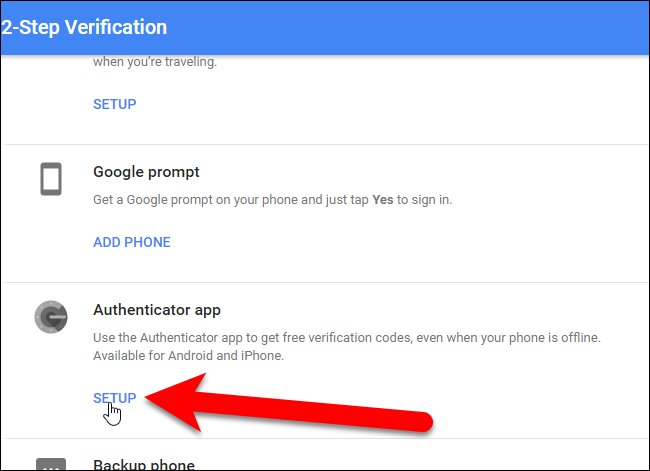
Step 17: Now enable the “Google Authenticator” and connect your phone to your Google account. Then Click on the “Setup” option which is placed on Authenticator app.
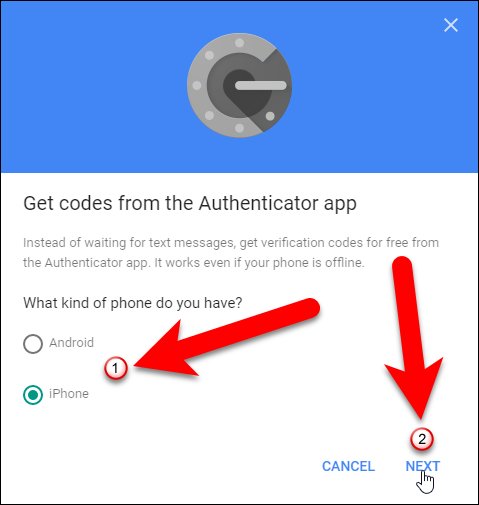
Step 18: A new window pop-up. In this, you select your phone type “Android” or “iPhone” and click on “Next” button.
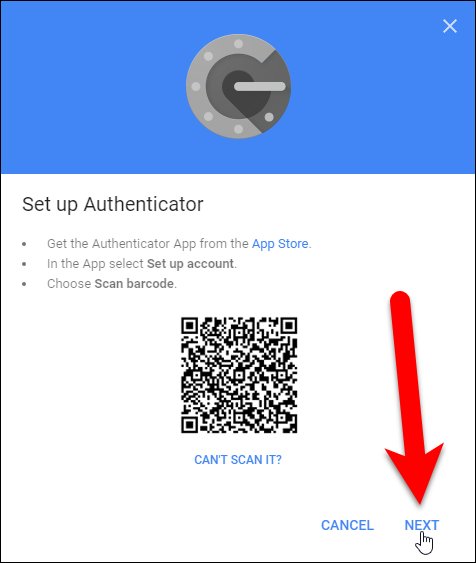
Step 19: Then a new window displays on your screen as “Set up Authenticator”. It shows a bar code or a QR code. So with the help of Google Authenticator App, you have to scan this code.
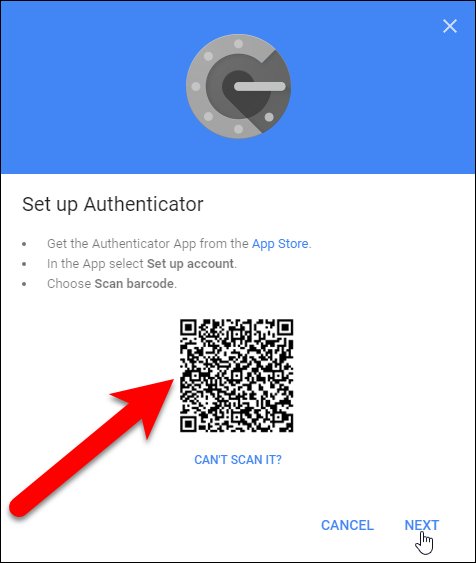
Step 20: Now install the “Google Authenticator App” from the “Google Play Store” or “App Store”.
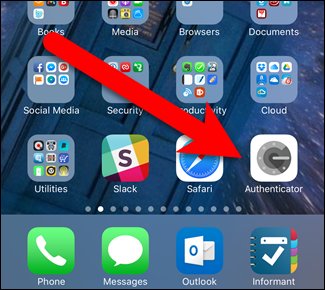
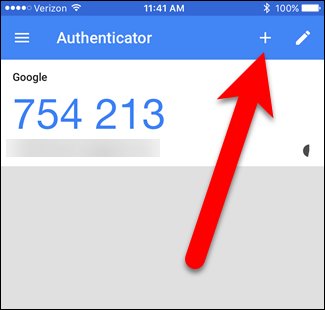
Step 21: Open “Google Authenticator App” and tap on the plus sign that is placed at the top.
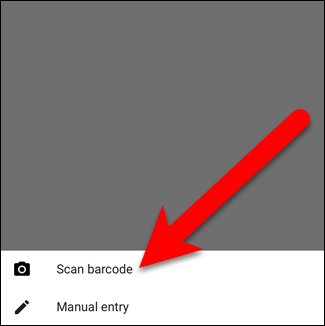
Step 22: It pop-ups the option of “Scan Barcode” at the bottom of the screen of the app and click on it.
Step 23: After this, it activates your phone’s camera and displays a green box. So put this green box on the QR code on your computer screen. So it automatically reads the QR code.

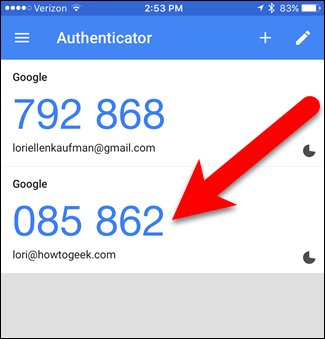
Step 24: It adds your Google account to the Authentication app and generates the code.We are almost done for Authentication Google account.
Step 25: In this, come back to your computer and click on “Next” button.
Step 26: The generated code in the app that enters the Setup authenticator screen and clicks on “Verify”.
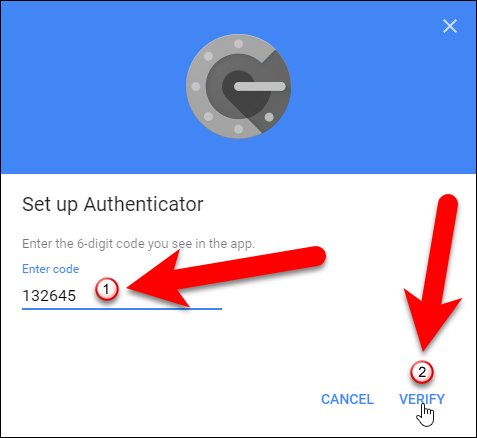
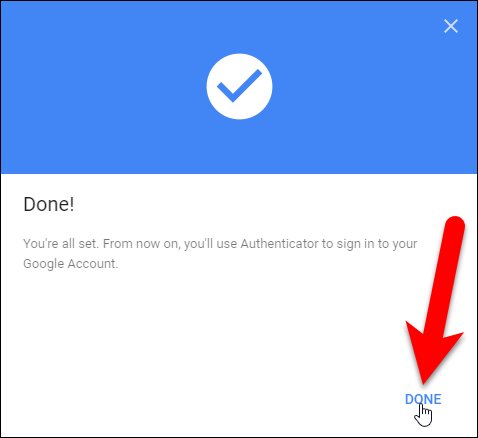
Step 27: A new window pop-ups and click on “Done” to complete the process and close it.