Windows 10 was supposed to give superior performance to PCs and Laptops running the previous series of windows but high CPU Usage has been reported by many users.
Various Windows 10 users have been facing problems about unexpected memory leaks pertaining to system processes like ntoskrnl.exe & Runtime Broker, wherein an increased amount of RAM & CPU usage during PC boots up has been extensively reported.
There are many ways to fix the problem of High RAM & CPU usage of Windows 10 that are mentioned below:
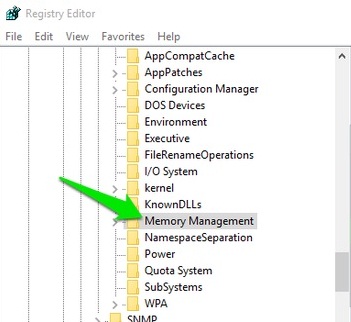
1. Registry Hack
It is used to disable RuntimeBroker.
• Press the key Win+R

• Type “regerdit.exe” and press enter to open Registry Editor.

• In this, go to,
HKEY_LOCAL_MACHINE\SYSTEM\CurrentControlSet\Control\Session Manager\Memory Management in the editor.
 • Find ClearPageFileAtShutDown
• After this, the value changes to 1.
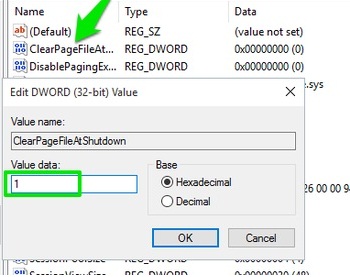
• Restart the computer.
Also Read: How To Completely Reset Network Settings On Windows 10
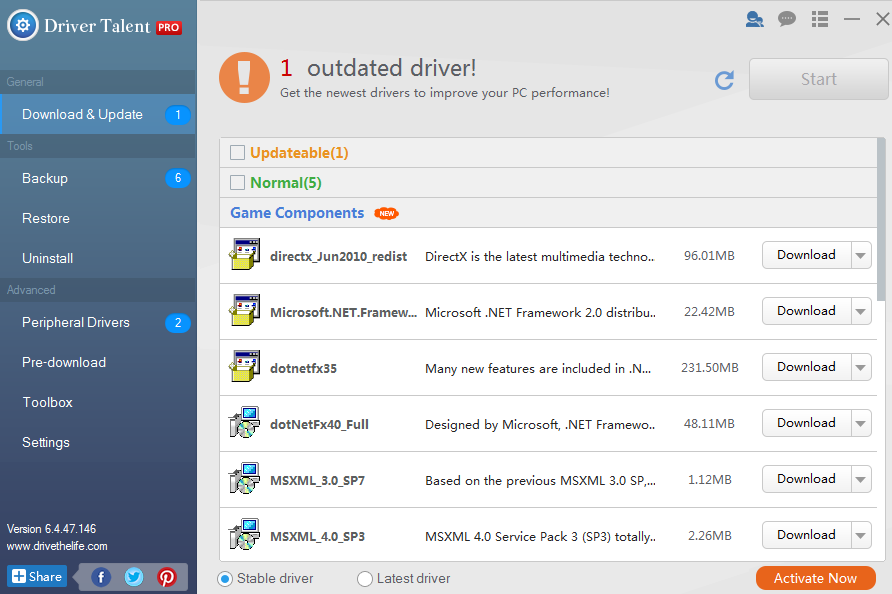
2. Fix Driver Issues
• To solve Driver Issues, firstly download the software of Driver Talent.
• Run Driver Talent to scan your computer to identify all driver issues.
• Fix the driver issues by clicking on the buttons of “Repair”, “Update”, “Reinstall”, “Install” etc.
• Restart the computer after all the drivers are fixed.
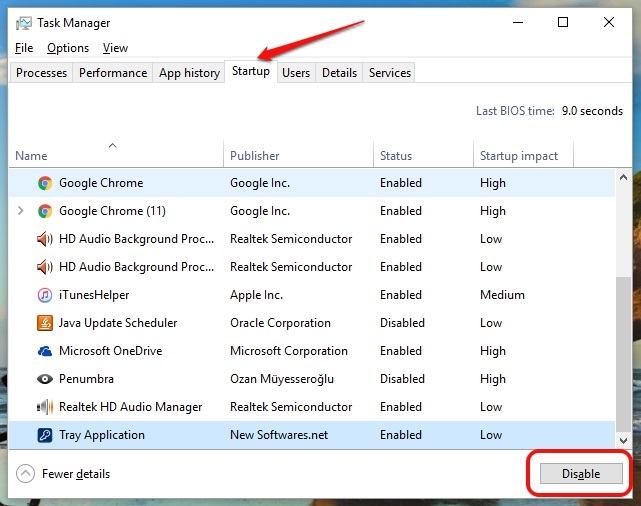
3. Disable startup programs
• Open Task Manager and go to the fourth tab “Startup”. Here, all the programs will be listed along with their impact on the CPU & memory.
Click on “Disable” tab to disable any process or you can also right-click on the program and select “Disable”.
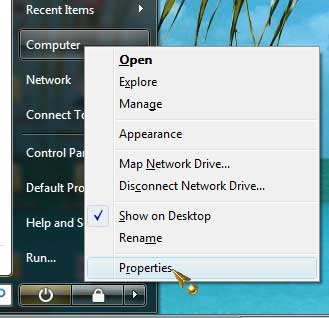
4. Adjust your Windows 10 for the best performance
• On the start screen of Windows 10, click on the “Desktop” icon.
• Right, click on “Computer” icon and select “Properties”.
 • Select “Advanced System Settings” to go to the “System Properties” windows.
• Select “Settings”, “Adjust for best performance” and “Apply”.
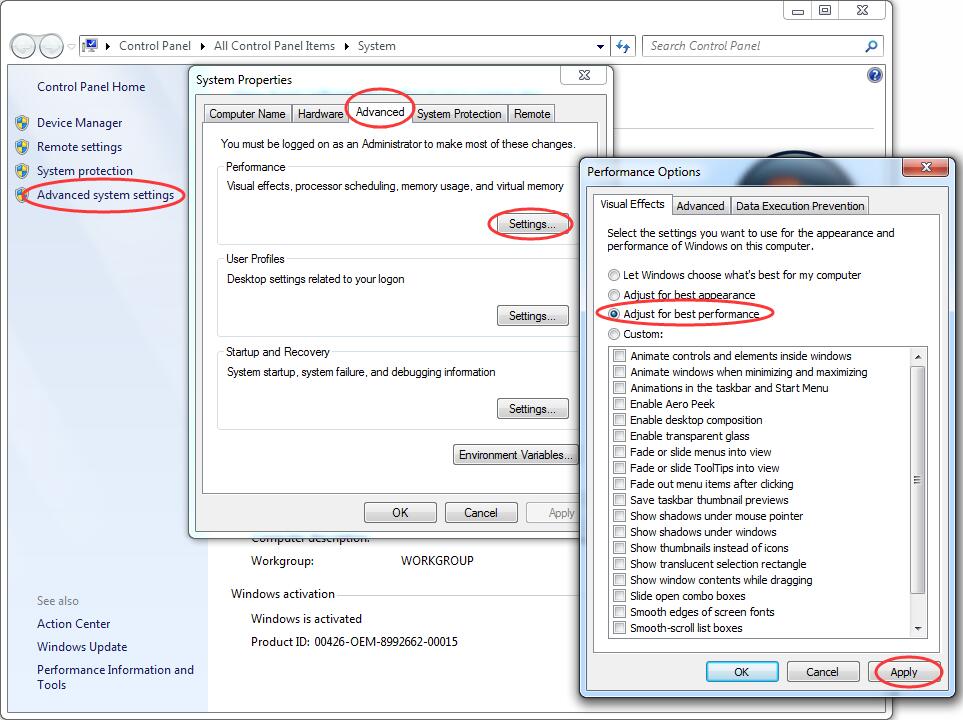
• Click “OK” and then restart your computer.
5. Defragment Hard Drives
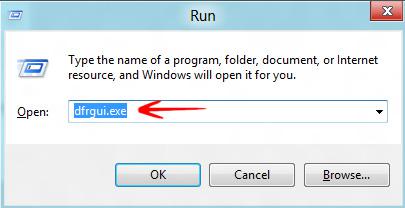
• Hit Win Key + R.
• Type “dfrgui” and press enter.
• In the new window click on the hard drives and you become able to defragment. But give the preference to that drive where you installed your window.
• Click “Optimize” and follow the instructions on the screen to finish the defragment process.
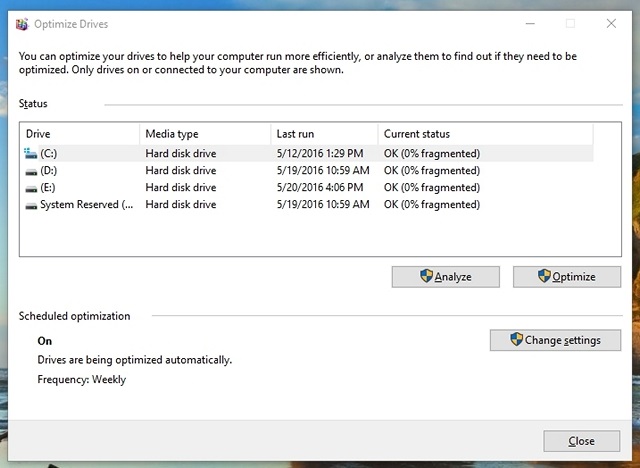
• Restart your computer.
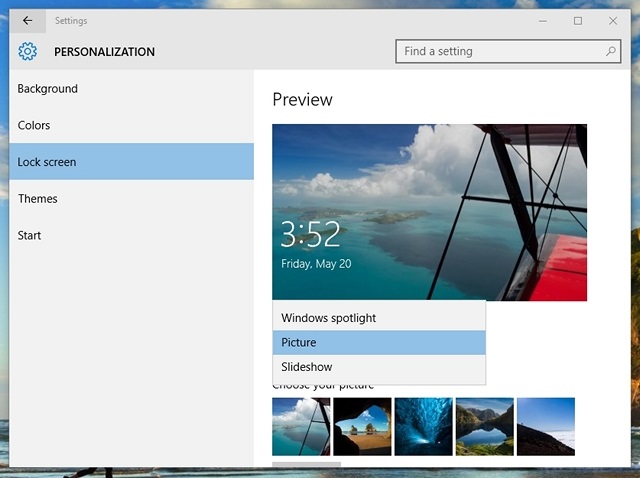
6. Turn off Windows Spotlight
Windows Spotlight is the lock screen of Windows 10 that gives stunning wallpapers. It does look cool but it runs in the background.
It consumes a high rate of RAM & CPU, so it’s best to turn off. To disable it, follow these steps:
• Go to Windows Settings>Personalization>Lockscreen.
• Now change the background from Windows Spotlight to a Picture.
7. Disable “Ok Google” in Chrome
Google’s Chrome browser has made a name for itself and it is the fast responsive browser. So this is the reason for your PC’s high CPU usage.
Reportedly, disabling Chrome’s “Ok Google” brings a pleasant impact on CPU usage. The steps are as follows:-
• To disable it, you go to Chrome Settings.
• In the “Search” section, uncheck “Enable Ok Google to start a voice search”.

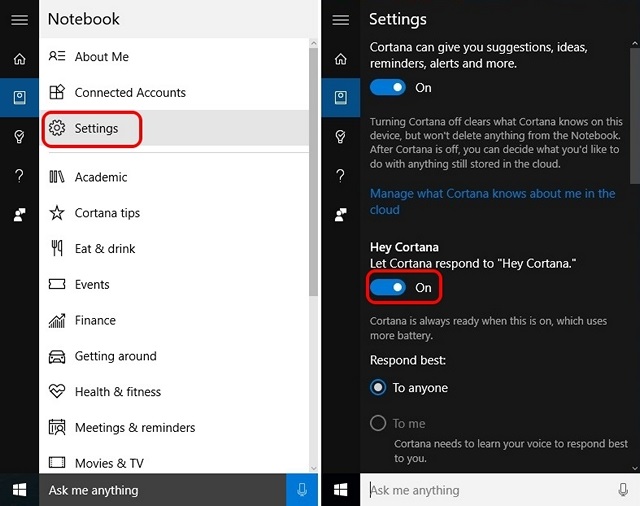
8. Disable “Hey Cortana”
This option also takes a lot of space of RAM and high usage of CPU so to improve the efficiency of Windows 10 disable “Hey Cortana”. It includes various steps, that follow as: –
• Open Cortana and hit the Hamburger Menu.
• Then, go to Notebook>Settings and Turn off “Hey Cortana”.
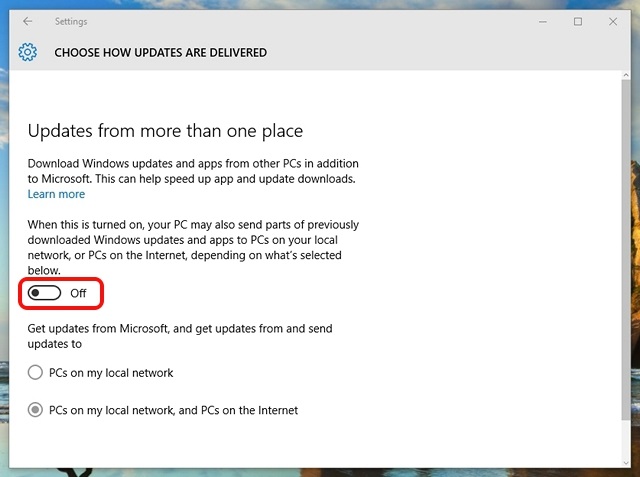
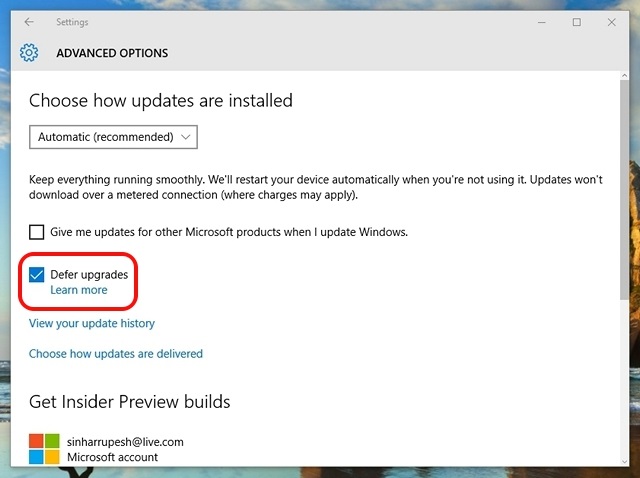
9. Change Windows 10 Update Settings
Windows 10 keeps on downloading updates automatically and even installs it. It also takes up a huge chunk of CPU resources and memory.
So, it is very important to change Windows 10 update settings so that PC’s CPU and RAM work well. It consists of the following steps:-
• Firstly, you need to turn off automatic downloading and installation of updates.
• Go to Settings->Update & Security->Windows Update->Advanced Options and check “Defer Upgrades”.
• But sometimes, Windows also tends to share your update with other PC’s over the internet. So you should completely disable this option.
• To turn off, go to Settings->Update & Security->Windows Update->Advanced Options->Choose How Updates are Delivered.